Traveling with a Boostedboard from the USA to Canada

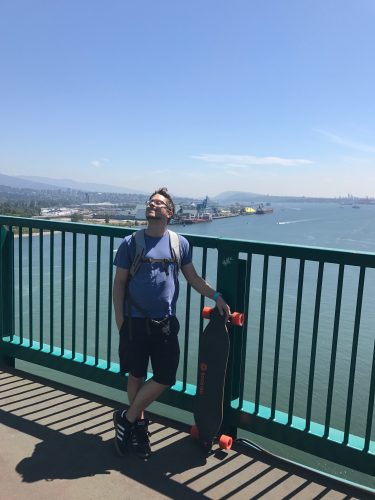
A week ago, I went to a trip to Canada. As I am super lazy walker & want to explore as much as possible of a city in a restricted time frame, I decided to pack my Boostedboard. I want to describe the trouble I had and give some advice.

My flight from the east coast of the US to Montreal had a one day layover in Vancouver, where I spent 24 hours. That brings us to a total of 4 flights from 4 different airports and 4 different security checkpoints (2x Canada, 2x America). Lets get it started:

The Basics

I took the Boostedboard 2nd generation with me, and this is very important: you can not remove the battery from the first generation board. That being said, before each flight I removed the battery from the board and packed it into a fireproof bag. This is the recommended procedure: remove the battery and take it as a carry-on into the cabin. It does not matter if you check in the board itself or not: the battery has to go with you.
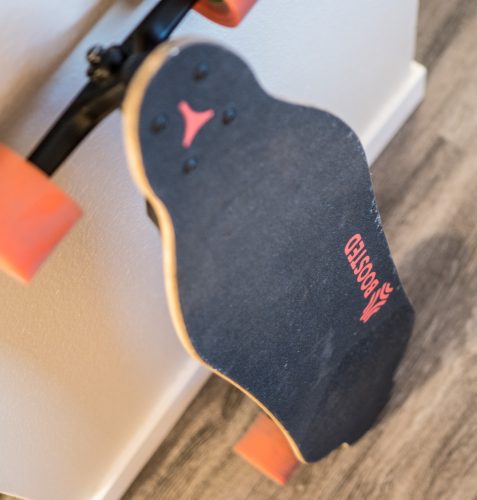
The second important thing: Pack the board into a bag. Either get a special board bag for it, or find something else. I reused the carry bag of my snowboard and it worked pretty good. Packing it makes it way easier to carry & makes your life easier if you decide to not check the board in.

Flight 1: Delta Airlines US to Canada

I was not 100% sure if I have to check the board in or not. My preference was to NOT check it in. Not because I am super stingy, rather because I don’t thrust the cargo personal to handle the package with enough care. Also, not checking it in gave me peace of mind, as I always knew (more or less) where the board was.

That being sad, I went to the checkin counter and just asked: “Hey, do I need to check that in”? To my surprise, they told me that I can most likely take it with me into the cabin, but need to make sure to talk to the people at the gate first. So I headed straight to the security checkpoint. First mistake I made: battery needs to go separate through the x-ray. Besides that, people were super friendly, asked what it is and what it´s for, made some checks and I was good to go.

At the gate, I asked what to with it. They told me I can take it into the cabin. Did that, and put it into the overhead compartment, where it blocked a complete segment for other bags. Didn’t like that, but the plane was almost empty, so it did not really matter. Also, that was the reason why I was able to take the board with me into the cabin: it was almost empty. Sadly, it would not be that simple in the flights to follow.

Flight 2: WestJet Vancouver to Montreal

To my surprise, TSA was a lot stricter at the Canadian airport. Same as first time, battery did not pass the x-ray and I got called. I explained the TSA agent what it is. That caused some confusion and the supervisor was called. But: the supervisor knew the facts.

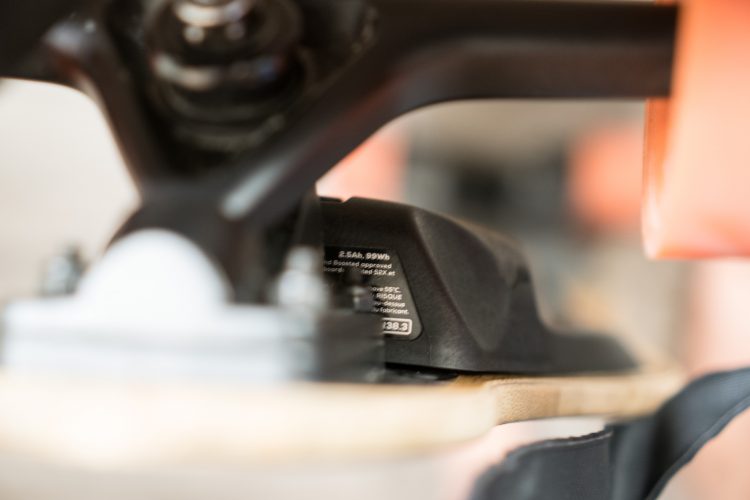
Battery capacities of 100-160wh require the permission of the airline. Thats exactly why the Boostedboard battery has 99wh:

Thankfully, Boosted printed exactly this on the battery. No discussions, TSA passed.

At the gate, I asked again: “What do I do with it”? This time, the flight was fully booked. So no way to put it into the cabin. But: They offered me to check it in as a stroller. But what does that mean?

They gave me a tag where they printed my name on and attached it to the board bag. Before entering the plane, I dropped the board next to the entrance (in the sky bridge). The cargo crew picked it up from there and stored the board in a separate area in the cargo bay of the plane. This is also the place where the board can get picked up after arriving at the destination airport: no waiting at the luggage belt. All of that with no additional cost.

I was surprised as I did not know this is possible. Awesome!

Flight 3: WestJet Montreal to Edmonton

Holy fuck, Montreal. TSA was a nightmare. As usual, I got called after the x-ray check. This time, nobody knew shit. A total of 6 people were called to the checkpoint, including representatives of the airlines. Nobody knew anything.

In the end, the TSA agents and supervisors were standing next to me, starring into their smartphones and trying to find out the actual rules for Lithium Batteries.

At one point, the TSA agent showed me his findings: a text that clearly said “100-160Wh require permission”. I just said: “Yeah, and 99Wh is smaller then 100Wh. So you just confirmed that I can fly with it”. He did not agree.

After a total of 40 minutes the airlines representatives gave green light.

I was able to do the stroller checkin again on this flight.

Flight 4: Delta Airlines Edmonton to USA

This one was special: My layover only was 3 hours. So one would expect there is no TSA as I never left the airport? Wrong.

Edmonton has a USA immigration office. So the actual immigration happens in Canada. With a separate TSA. And I have to say that was the friendliest TSA ever: I got asked what it is, it got checked, friendly chatter, TSA passed. Stroller checkin again this time.

Summary

Thats it. A lot of stress. Was it worth it? Hell yeah, both cities are great to have a BoostedBoard with you. But if you decide to take your board on a plane, be prepared and know your facts. Also:

  • Come early – things can and will happen
  • Have a backup plan: What happens if you can’t fly with it? Know someone in the city to send the battery to?
  • Be friendly 🙂 – even if TSA does not know what to do, be open, explain what you know and let them do their job. Don’t piss them off. They can and will deny you entrance if they feel the need to.
  • Ask the people: Ask at the gate, what to do. If they deny the stroller checkin trick, they might still offer you to checkin the board.
  • Plan extra time at Canadian airports 😉

Mavericks/Yosemite Dual-Boot on a DIY fusion drive

As OS X 10.10 Yosemite DP1 runs awful in a virtual machine I wanted to install it onto my MacBook as a dual-boot configuration with OS X 10.9 Mavericks. My MacBook runs on a self-made FusionDrive configuration using a SSD and a regular hard disk. Here is a link to a HowTo for that FusionDrive stuff. As Mavericks is already installed, the hard part was to create partition for the Yosemite installation. What absolutely is not working is:

  • Simple create two volumes on the FusionDrive using the “diskutil coreStorage createVolume” command
  • Add a second partition using the disc-utility

The disc utility does create a partition, but it completely ignores the size you specified. For me it worked by booting from USB and using the “resizeStack” command (I got that hint from here).

diskutil cs resizeStack X Y 991G jhfs+ Media 120G

This command will resize the FusionDrive volume to 991G while creating a second partition with the size of 120GB. To exactly know how big your partitions should be, type:

diskutil cs list

It will show you the size of the current volume. If its, for example, 1000GB and you want to create a 20GB second partition, type:

diskutil cs resizeStack X Y 980G jhfs+ partitionname 20G

X should be the UID from the volume you want to shrink (also called Logical Volume (not Family)). Y is the UID from the physical volume you want to create the 2nd partition on. I used my regular disk for that to avoid reducing the performance of my FusionDrive. To make it clear: The second partition will not be part of the FusionDrive, so the performance may be slower that used to. To display the UIDs use the list command:

diskutil cs list

After that, install Yosemite on the newly created partition. After a successfull installation, you can choose which system to boot by holding the alt-key on boot. Worked for me and I hope it will work on your setup, too 😉

OS X Yosemite 10.10 in Virtual Box

I finally managed it to install Yosemite in VirtualBox as a, well, virtual machine.

Create a new virtual machine, choose OS X 10.9 x64 as operating system and give it some RAM. Then you need to prepare the install disk image (i have used the developer preview version!) with the following steps (taken from here):

1
2
3
4
5
6
7
8
iesd -i /Applications/Install\ OS\ X\ 10.10\ Developer\ Preview.app -o yosemite.dmg -t BaseSystem
hdiutil convert yosemite.dmg -format UDSP -o yosemite.sparseimage
hdiutil mount /Applications/Install\ OS\ X\ 10.10\ Developer\ Preview.app/Contents/SharedSupport/InstallESD.dmg
hdiutil mount yosemite.sparseimage
cp /Volumes/OS\ X\ Install\ ESD/BaseSystem.* /Volumes/OS\ X\ Base\ System/
hdiutil unmount /Volumes/OS\ X\ Install\ ESD/
hdiutil unmount /Volumes/OS\ X\ Base\ System/
hdiutil convert yosemite.sparseimage -format UDZO -o yosemitefixed.dmg

You can save these commands as a bash script, run it and relax. When finished, mount the yosemitefixed.dmg as a live-CD in your virtual machine. Internet said it is a good idea to change the chipset of the virtual machine to PIIX3, so do that. After installation it is important to remove the live-CD image and reboot. Voila, should work. Good luck!

But performance is really bad at the moment.

The new the-skylab.de Canvas Portfolio

I launched a new the-skylab.de front-/portfolio page today. I felt inspired by the current Vodafone advertisements, so I decided to do something in the same direction.

The skyLab logo should be the central element of the page and is used to navigate. Each click brings a new scene using a rotating black area which uncovers the content. The second scene features a full-screen view to make it possible to show more content.

The new page is heavily driven by Javascript and uses some new technologies like canvas, so i decided to give you some technical background and tell you about the problems I encountered.

This is how it looks like:

skylab-animation

The Final Result

DOM vs Canvas

At first I was unsure which technology to use. I started with some testing using pure DOM technology. I created a square using a DIV element, added round corners to it and did the rotation using jQuery and CSS3 transforms.

dom

Rotating Square using a DOM Div

The result was looking ok, but it felt a bit dirty and needed a lot of unnecessary HTML glue code to work correctly. So I decided to use the new hot shit: HTML5 Canvas.

I checked the “official” Canvas-API first, but as usual, there are a lot better Javascript-Libraries out there which make the work easier. I checked some frameworks and decided to use fabric.js. Most of the frameworks support the drawing of circles and rectangles and the rotation of those, but lack the ability of setting an origin point for the rotation. A centered rotation doesn’t help me with my concept.

Script

Then I started implementing the script. It uses the concept of “scenes”, gathered together in a “script book”. I can specify the scenes in code which includes a specific rotation of the black area (which is no longer a rectangle, it is a custom drawn triangle path now) and pre- and post-hook to execute and my script will do the rest. These hooks are used e.g. for the circle animation in the second screen.

Problems

Resizing

One big problem was the strange behavior of the actual canvas area which is used for drawing. In my case it is needed to fill the whole screen. But if you specify the size with CSS, it “scales” the drawing area but does not increase the size of the actual canvas used to draw. This results in ugly and unsharp drawing. You need to specify the size of the canvas in the HTML tag to make it work – or, as a workaround, you can set it via Javascript. This was the solution I decided to use. Currently, I’m hooking into the resize event of the browser and I’m doing a resize of the canvas area.

Also, the page needs to have a minimum and maximum size, otherwise the black area will get to small for the content. This problem isn’t yet solved completely, because enforcing a minimum and maximum size and falling back to scroll bars is currently causing drawing issues.

Mobile

Surprisingly, the page was working great on all mobile devices (I tested iOS7 iPhone & iPad & latest Android stuff). There was only a problem that the initial zoom level was to small on the phones with smaller screens. But there is a workaround: You can set the default view port with a HTML tag like this in your head:

1
meta name="viewport" content="width=1024 height=768

Content and Images

I used a trick to create the illusion that the black circle actually uncovers the content. In fact, that’s not the case. It fades in right before the rotation animation is starting. As the text color is white, the content is invisible until it’s covered with the black background. Unfortunately, that doesn’t work with images. They would be visible before the rotation animation is complete. I arrived at the conclusion that the best workaround is to fade the images in and out with a timed delay right before and after a scene change.

Conclusion

Finally, it was as usual a lot more work than I expected. Especially it wasn’t easy to get the right timing of all animations. But in my opinion, the result is great. I did test it with some people and most of them were sure about what to do. After some initial user tests I implemented the pulsating logo which you can see when you’re initially loading the page which makes clear “I am the logo, click me!”.

A problem with the usage of Canvas is that the page will not run on old browsers. But luckily, in these days that’s a thing you can disregard more and more as every major browser is updating itself.

What do you think about the result?

Layout overhaul

Yes, you’re eyes are not lying! After 7 years(!) the skyBlog gets a completely overhauled template. Yey!

MacBook Pro Early 2011’s are melting / graphic card problems

A few weeks ago, my MacBook Pro 2011 Early started to behave strangely. It started right after I had upgraded my system to Mavericks. I was testing the new iMovie as I was getting a black screen (of death). After a hard reset, the the grey boot screen (with the Apple logo) looked scrambled with strange line artefacts. And the machine refused to boot. I managed it to get the machine working a few last times (doing 100 reboots and trying out all boot options), but finally the machine was dead. It was clear, that the discrete graphic card has a problem. And so, the only solution was to replace the hole logic board.

So I went to the Apple Store. I had to wait 1.5 weeks to get my MacBook back and the price for it was 490€.

A quick look into the internet reveals: Apple has a problem. It looks like the number of melted MacBooks from 2011 is fast increasing:

https://discussions.apple.com/thread/4766577?start=1545&tstart=0

My flatmate, who also owns an Early 2011 MacBook, saw his MacBook fried this morning and is on his way to the Store now.

There is hope that Apple will announce an official replacement program in the future (and give a refund for the repair costs), but until then you have to pay the replacement yourself. But if you do, tell the Apple Staff that its a really common problem and their should do something about that now.


Install Windows/Bootcamp on MacBook Pro with Fusion Drive and no Optical Drive

Installing Windows on a Machine without a Optical Drive is a pain, because its no longer possible to boot from the Installation DVD. USB is no good workaround, because USB boot is also permitted somehow.

The case is getting more complicated when you have a FusionDrive setup as I have: I replaced my Optical Drive with a second harddisk (SSD) and formed one Volume out of it as a FusionDrive.

After Google’ing for many hours, i found a solution which actually worked on my setup.

http://huguesval.com/blog/2012/02/installing-windows-7-on-a-mac-without-superdrive-with-virtualbox/

Some Additions:

  • Even If you have an MacBook Pro 2011: Do Part 1 Step 3! I didn’t do it and after rebooting I got a blue screen
  • To trick the Boot-Camp Assistant creating the partition for you, it also works mounting the Windows Installation ISO with Toast or Daemon Tools
  • The correct installation order is: FIRST create your fusion drive, then let the BootCamp Assisstant build the Windows Partition
  • Don’t try the solution with replacing the MBR with the one created in the VM: It does not work on a FusionDrive setup
  • To avoid the complicated removal of the “system reserved” partition as stated in the manual, do this: When you install Windows  in the VM, format the drive. A message will popup informing you that it may create some more partitions blabla. Click ok and you will see it actually created 2 partitions. Now manually remove the small 100 MB Partition and install on the other one. It will work and boot correctly.
  • WinClone is no longer free available as some stupid company bought it and did some minor updates to it. But maybe you find it somewhere. If you use the latest version, it will ask you if it should delete the cache files while creating the image. I clicked yes. On restore, I had it replace the booting-information.

Finally it worked. When I boot my mac holding ALT the boot device selection menu shows up. It displays my Mac drive two times as well as the windows drive two times. Anyone know a solution out there how to fix that?

Paying attention to details

I am currently working on an overhaul of Episodes main interface. As a Mac developer, you need to pay attention to the small things. This is what a good App makes a great App.

In the last days, I’ve spent several hours in reworking the small view on the lower left which indicates that Episodes is doing some tasks in the background. This is how its looking in current version:

old

Its okay, but its not great. The expand/collapse animation was a bit buggy as well as the progress indication itself. To improve the visual appeal I decided to invest some hours to make it perfect. This is the result. My goal was to let it look like its “below” the surrounding  interface. I’ve also added an animation which “slides away” the concealing panel.

panel

In the next iteration of Episodes i’m going for a borderless interface, which leads to some problems.

blank


What happens if the list is getting longer or the user resizes the window? A scrollbar will become visible with its bottom end hanging loose in the air. It would look pretty bad. My solution is to slowly fade in a shadow to distinguish the list from the bottom menu.

light

This makes it a lot better. Apple uses the same approach e.G. in Apple Mail and its great, but its not yet in the framework so each developer has to implement it them self and most people are doing it only half-assed.

But thats only half the deal. What happens if the progress-panel slides in? The gradients and shadows have to match in this combination also.

full


These are the small things which need a lot of work to make them right. Most people won’t even notice any of then. But they would, if things would look bad. Its makes an App better, as the User feels better when he uses it.

Custom selection/highlighting colors in a view based SourceList using a NSOutlineView (badge)

I’ve tried to implement the “Bubble” badges that Apple uses in many applications using a view based NSOutlineView, e.G. Mail:

Bildschirmfoto 2013-03-21 um 12.50.16

There are many solutions out there (see PXSourceList), but I wanted to use a view based approach this time.

Its no big deal creating the view, but when you start implementing the Badge you will face several problems. You may use a NSButton with inline style here, but if you start binding its title to your data things starting to go wrong as its clearly the wrong control for this case. So I decided to use a custom NSTextField with custom drawing.

Bildschirmfoto 2013-03-21 um 12.53.45

The main problem was the different drawing if the row is selected. You need to change your font- and background color. As a NSTextField, you do not know if you are highlighted or not and so you can’t do that. After some digging in the documentation if found the solution:

The enclosing NSTableCellView gives its subviews a “hint” how it should draw itself. The method it uses is

1
- (void)setBackgroundStyle:(NSBackgroundStyle)<em>style</em>

The docu says:

The default implementation automatically forwards calls to all subviews that implement setBackgroundStyle: or are an NSControl, which have NSCell classes that respond to setBackgroundStyle:.

So what you have to do is to simply implement setBackgroundStyle in your custom NSTextField. For example, save the set value to an ivar:

1
2
3
- (void)setBackgroundStyle:(NSBackgroundStyle)style {
_backgroundStyle = style;
}

Finally, use this value in your drawing code and you’re done:

1
2
3
4
5
6
7
8
- (void)drawRect:(NSRect)dirtyRect
{
...
if (self.backgroundStyle == NSBackgroundStyleDark) {
backgroundColor = [NSColor darkGrayColor];
} else {
backgroundColor = [NSColor lightGrayColor];
}